
Assembling a gallery wall requires just a few basic tips to achieve the look you desire. By incorporating color themes, framing strategies, and an organized layout plan into the equation, your personal style can come alive in an eye-catching and cohesive fashion.
Begin your gallery wall design with an emphasis piece and build around that point. Varying sizes and frame styles will add depth to the display.
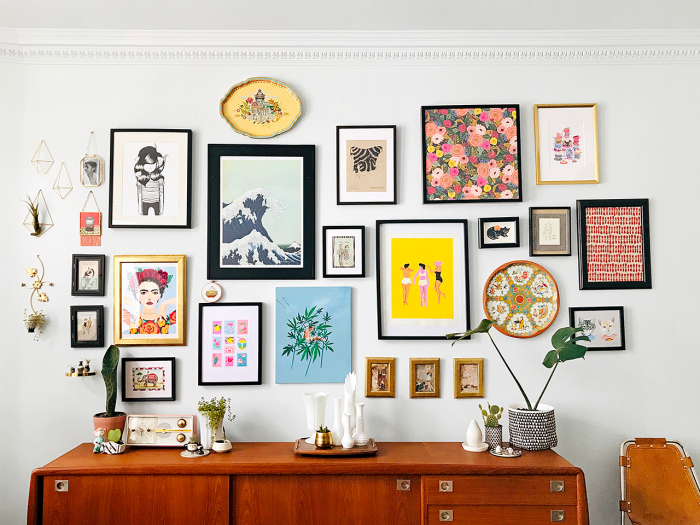
Start With a Focal Point
When creating a gallery wall, selecting one piece as its focus can make for an effective display. By doing this, the rest of your display will appear more cohesive and organized.
Focal points can be any piece of artwork or decor that attracts attention visually, and can create an engaging space to spend time. Spreading several different focal points around a room creates an exciting place to spend time – and may even spur conversations among guests!
Focal points in photography are an integral component of composition that can dramatically change the look and feel of your image. Not only can focal points add dimension, they can also help tell a story or emphasize specific features within a subject matter.
Finding an effective focal point requires looking for something that captures attention, such as a window view or outdoor scene, then using this focal point as your arranging guide.
Keep Your Frames of Different Sizes
It is key when creating a gallery wall to maintain frames of various sizes together to achieve balance and a sense of order on the wall.
Though many galleries look best when the frames are evenly spaced, you could also consider going for an eclectic or random layout that reflects more of your personal aesthetic and decor style. Don’t confuse this with chaos – rather make sure that it reflects who you are as an artist!
More frames means more variety when it comes to style and finish – for instance, two modern frames could sit alongside one more ornate design.
Feel free to mix and match colors and styles according to your mood, providing visual interest without taking up too much room in your home.
Once you’ve decided how many frames to hang, the next step should be arranging them. To maximize impact and maximize visuals, try hanging the largest picture eye level for maximum impact.
Create a Balanced Look
When creating a gallery wall, it’s essential that pieces are placed in such a manner that creates visual harmony across all pieces and throughout the wall as a whole. Although not symmetrical in form, visual harmony should exist among pieces and the whole wall.
For this look, begin by placing the largest pieces first, and fill in with smaller art as necessary. Large pieces should be hung at eye level (152 cm or five feet from the floor) so as to create an impression of height in your room.
Ideal frame ratio should be eight-10 times smaller than its largest frame for optimal results. Varying sizes and colors is also encouraged.
Keep It Simple
Arranging a gallery wall may seem daunting at first, but it doesn’t need to be difficult. With some simple guidelines in mind, you can quickly and effortlessly craft an eye-catching gallery wall design.
First, think carefully about what art you want to feature on your wall – be it family photos, children’s artwork, travel photographs and memorabilia, etc.
Next, decide how you’ll mix frames. Are you interested in mixing different sizes or styles of frames together?
Consider how many pieces will fit onto your gallery wall before settling on a number.
No matter if your collection comprises vintage prints, original art, flea market paintings or photographs – keep it looking harmonious by selecting pieces with similar hues.
To create an aesthetically pleasing gallery wall, space all frames two to four inches apart on the wall. This will help make the collection seem organized.

